Showing posts with label My Creative Studio. Show all posts

Thursday, January 26, 2012

Easy No Sew Curtains

I made these curtains last summer when I was working on my creative studio but never got around to posting the pictures. Since the challenge is window treatments this week at The CSI Project I thought I'd take pictures and share.


So these curtains actually started with two top/flat sheets that I bought individually at WalMart for about 5 bucks each. They have a great selection of colors that are perfect for various projects and I obviously chose teal since the color scheme in my creative studio is teal, black, and white.

So to create a hole to run the curtain rod through, I just turned the sheets over and made a small slit on each side of the wide seam at the top of the sheets careful just to cut the back side and not all the way through to the front. Then you just run the rod through and hang it! It should look something like this......


It's seriously THAT simple!

They looked a little plain though and I wanted to tie in some black and white to match the rest of my creative studio so I had some black and white damask fabric left over from another project that I thought would work great to create a valance of sorts. I also grabbed some Stitch Witchery, black ribbon, and my iron and got to work.

First, I traced a bowl on to some cardstock. Then I cut it in half. I then traced a bunch of those on to my fabric and cut them all out. Following the instructions on the Stitch Witchery, I adhered the half circles to the black ribbon just slightly overlapping them and then I attached them to the curtain rods.

It was a pretty easy project and inexpensive and I'm pleased with how they turned out.


Linking to the parties listed in my sidebar
and
Visit thecsiproject.com

Tuesday, August 30, 2011

Create Letters Re-Done

You may remember this post from awhile back in which I showed you my "create" letters that hang above the door in my creative studio

They looked like this:


Cute, but it doesn't exactly go with my new color scheme.

So I ripped off the existing paper, sanded the letters down and then painted some black and some teal. Then I decopauged black and white or teal scrapbook papers onto the letters and accent with ribbon and satin flowers and this is the end result.


Much better and much more ME! 
Now just need to get hubby to hang them.....

(Linking to the crafty parties listed listed in my sidebar)

Tuesday, August 23, 2011

From Drab to Fab: Teal and Damask Tray

So I had a plain wooden tray lying around in my stash and decided to fix it up and use it to hold some of my supplies in my creative studio.

I started off with a plain wooden tray. Pretty Drab!


I painted it the same shade of teal as my dresser. Then I covered the bottom of the tray with the same black and white damask wrapping paper that I used on the back of my bookshelves.

Love the end result!

(Linking up to the parties listed in my sidebar)

Thursday, August 18, 2011

Chandelier Canvas Art

I am in the process of creating a few pieces for the walls of my creative studio and will be sharing those as I complete them.

I fell in love with this chandelier art I saw over at Craft-O-Maniac and pinned it on Pinterest to save for future inspiration. I had a spare 10 x 10 canvas sitting around and remembered the chandelier art. I had purchased a similar chandelier file from the Silhouette store months ago for a different project. So, I decided to paint the canvas teal. It took about two coats. Then, I cut the chandelier out of black vinyl and put it on the painted canvas.


I liked it but felt it needed something else to help it "pop" so I decided to bling it out and glued rhinestones on to it.

Then to finish it off, I glued black and white houndstooth ribbon to the edges of the canvas.


Love it!

Now I just need hubby to hang it!

(Linking up to the parties listed in my sidebar)

Tuesday, August 16, 2011

Bookcase Makeover

I'm so excited to finally share my bookcase makeover for my creative studio! Instead of holding books, this bookcase houses a lot of my craft supplies in an organized fashion. 

I've actually had this bookcase for years and it's been all sorts of colors (white, blue, brown) but it was starting to look kind of bad and definitely time for a fresh coat of paint. I'm almost embarrassed to show you the before - it was MESSY! (I promise, it wasn't always THAT messy!) But I think to fully appreciate the new and improved bookcase, you must see the before.

So, once I cleaned off the bookcase, I sanded the bookcase down and then I painted it with two coats of flat black paint. It looked a million times better at that point - but I wanted to do something different - I wanted to add paper to the back of the bookcase. (Like this pretty cabinet!)

I'm using different black and white prints in my creative studio and I found a big roll of black and white damask printed wrapping paper at Hobby Lobby that ended up being three bucks for 50 square feet with my coupon.


I was actually nervous to paper the inside of the bookshelf. I was scared I'd mess up or it wouldn't be straight or something. But, I decided to go for it - if I did one shelf and didn't like it, I knew I could just rip it off, sand the heck out of it, and repaint it.

The wrapping paper had a grid on the back of it. This made it SO much easier! I used spray glue to adhere the wrapping paper to the back of the bookcase. I liberally sprayed where I needed the paper to go then I started at the top of that particular shelf and worked my way down, smoothing it straight as I went. It was so much easier than I thought it would be and I LOVE the outcome and am seriously having to restrain myself from running around and papering all the bookcases in my house.

Ok, enough teasing.... Ready to see the end result?

Ta-da!

Here's some closer looks.....


Everything is sorted and in different baskets an all organize now! Boy, does it feel good to have it all organized! I have the ribbon all sorted by color - I even rolled up all the ribbons and secured them with straight pins. My Momma would be so proud!  All the baskets actually came from the Dollar Tree. I wasn't looking for baskets there but when I saw them I knew they'd be perfect and you can't beat the price. 

I made the labels using my Silhouette machine and adhered them to the baskets with glue dots. 

The large shelf houses my paper storage boxes. (Go here to see how I made them.)
I sorted some of my embellishments into little jars that I already had. 

More miscellaneous crafting supplies sorted into baskets. 
And the very bottom shelf holds my large paper trimmer, crop-o-dile, and other necessities. It's not as pretty as the other shelves so I may try putting those things in the closet. 

Love it! 
Pretty and organized!

Linking up to the linky parties listed in my sidebar 
and 
Visit thecsiproject.com

Tuesday, July 26, 2011

Thrifty Paper Storage

One of my biggest dilemmas in organizing my creative studio was how to store my scrapbook paper. Paper crafting is one of my favorite crafting mediums (although freezer paper stenciling now runs a close second) so I have LOTS of scrapbook paper. 


I'm almost embarrassed to show you this but this was my old method of storing scrapbook paper in a large plastic box.....


And as you can probably see, it just wasn't working anymore. The paper was not sorted and it would take me forever to find a piece of paper that I was looking for and worst of all - the paper was sometimes getting bent! 


So, I new I needed a new method and started searching for new ideas. I knew that I didn't want to shell out a lot of money for a fancy storage unit, I wanted to DIY it. So, I googled, I asked friends, I looked on Pinterest, and finally I stumbled upon this you tube video and the wheels started turning in my little head. 


So I took a couple of these boxes
mixed in with a few other supplies. 


And now, my paper is stored like this.....
Ahhhhh! Love it! Best part?? This storage system was under 10 dollars to create!!


Wanna know how I did it?  


What You will Need:
Large boxes - I used old priority mail boxes that are 14 1/2 by 13 1/2 inches. 
Ziploc bags
Post it tabs
X-acto knife
Paint color of your choice and foam paint brush
Hot glue and glue gun
Ribbon
Labels for outside of boxes


How to make the boxes:


1. Cut your box to size you want using the X-acto knife. I cut mine so that it was about 12 1/2 inches tall.
2. Put your box together and secure with tape. 
3. Now paint your box! My box needed 3 coats in order to completely cover all the writing on the box.
4. Once your boxes are completely dry, glue on your ribbon using your glue gun. I did this because I'm not the best at using an X-acto knife so my edges are a little choppy in places so the ribbon covers up un-clean edges perfectly! 
5. Create labels for your boxes and glue them on. I made my labels in my Silhouette software and then cut them out of white cardstock. I just used glue dots to adhere them to the boxes. 


Now let's talk about the different labels and how to store the paper.....
I ended up with 5 different boxes for the following main categories: Colored Cardstock (I have two colored card stock boxes), Holidays and Themes, Patterned Paper, and Paper Packs. Each box then has sub categories. For example, in the holidays and themes box, the paper is divided into subcategories like winter, Christmas, summer, cooking, etc...  At some point, I'll probably add a box for scraps and most likely end up with the holiday paper and themed paper each in its own box. 


When I was sorting the paper, my living room floor looked like this for a little bit....
Holy Paper Batman!


Once I had it all separated, each subcategory  is stored in one of these jumbo ziplock bags......
 
I got them at Walmart and there are 12 in a package for about 2 dollars. I didn't want the zip top on them so I simply cut them off at about an inch from the top.


Then I used these post it tabs to write the name of each category on....
I also got those at Walmart and there are 24 of them in a package for about 3 dollars.I just wrote the name of each category on a label using a Sharpie and then stuck it on the top of the bag. 

Here's what it looks like when it is in the bag with the label tab..... 


So I just did that for each subcategory and then put them in the box for each main category. I have both 8 1/2 x 11 paper and 12 x 12 paper in the same bags. I put the 8 /12 x 11 paper in the front of the bags with the 12 x 12 behind it. I have my boxes all lined up on my bookshelf and just love how it looks and how easy it is to just run to the bookshelf and just grab the bag I need and then when I'm finished I just slide the bag back in the right box. 

Here's a couple of more views...... 
close up side view of one box

front view of one box
top view of one box


Linking up to the link parties listed in my sidebar
and
Visit thecsiproject.com

Tuesday, July 19, 2011

Dresser Makeover

I have an old dresser in my creative studio which houses different craft supplies including my Silhouette machine. Once I chose my new color scheme I knew I would need to paint the dresser to match. 


Here's the before picture................


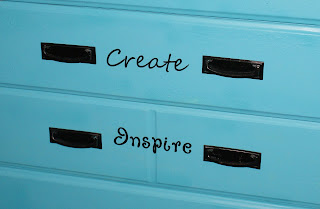
After sanding and priming, I gave her a coat of teal paint. I took the handles off and sprayed them black. But it still needed something else so I decided to cut out different inspirational type words out of black vinyl using my Silhouette machine and added those to each drawer. 


And now it looks like this............


Here's a couple of close ups of the drawers......


I lined the drawers with black and white patterned paper. I just put a light layer on Mod Podge in the drawer, laid the papers down, smoothed out any wrinkles, and added a light layer of Modge Podge so now the inside is pretty too.


I LOVE how it turned out! 


(Linking to the link parties listed in my sidebar)

Tuesday, July 12, 2011

Bulletin Board Makeover

This is another project I created for my Creative Studio. I just started off with a plain boring but functional bulletin board from the Dollar Tree that I have had for ages. 


This bulletin board has a frame that is difficult to remove. (I've tried!) So, ultimately I decided to leave it the bulletin board color. That really doesn't bother me that much especially since I created cute thumbtacks! 


Anyways, I put some paper on top of the bulletin board part and taped it down then I painted the frame teal. I made an simple rosette (favorite rosette tutorial here) out of some black and white polka dot fabric and glued it on the frame. 

My favorite part of this bulletin board is the thumbtacks! I just used a package of black and white buttons I bought at Hobby Lobby, some strong glue (E-6000 is my strong glue of choice), and some thumbtacks. I glued the thumbtacks to the back of the buttons. On some of the buttons, I threaded a bit of skinny light teal ribbon through and tied a little knot. 


Easy and cute! 


(Linking up to the parties listed in my sidebar)